ROT4 Advanced Technology Solutions
ROT4 • ADVANCED TECHNOLOGY SOLUTIONS Preparing your digital experience

Just a moment — we are almost ready

Back to the knowledge base
ROT4 Knowledge Base

Restore website files and databases

Recover a file or directory from server backups, then restore a MySQL database from an SQL file and confirm a successful import.

Illustrated guide15 minutesReviewed: August 2026

Before you start

  • ✓ A verified backup from the correct date
  • ✓ The exact file, directory, or database target
  • ✓ Enough available storage
  • ✓ A backup of the current state before overwrite
01

Open File and Directory Restoration

Under Files, open File and Directory Restoration. If it is absent, local backups or the feature may be disabled by the server administrator.
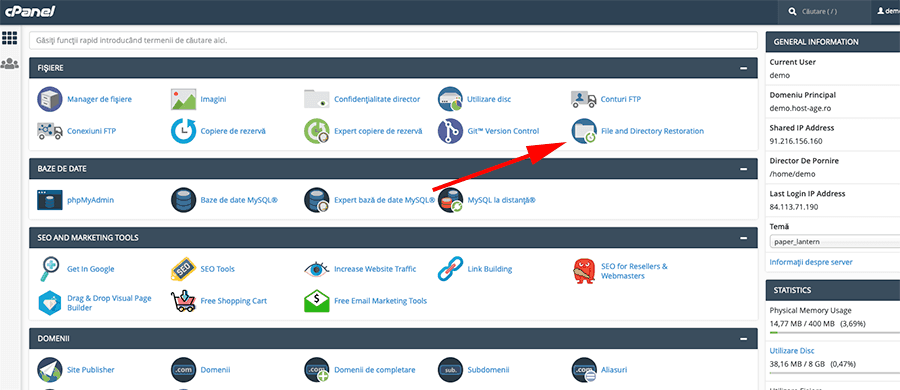
File and Directory Restoration location on the cPanel home page.
The arrow identifies the file restoration tool. Host-Age illustrated guide ↗
02

Browse to the website files

Choose Browse files and directories, then open public_html or the correct document root.
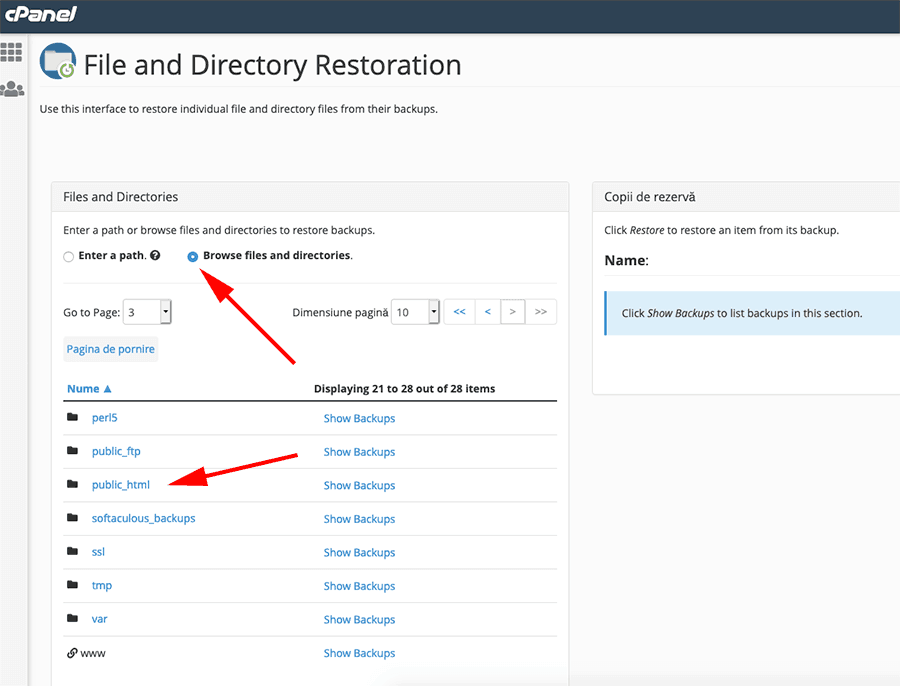
Browse files and directories selected with public_html visible.
The image shows browse mode and the website directory. Host-Age illustrated guide ↗
03

Choose the file, backup date, and Restore

Choose Show Backups beside the target, select the correct backup date, choose Restore, and confirm.
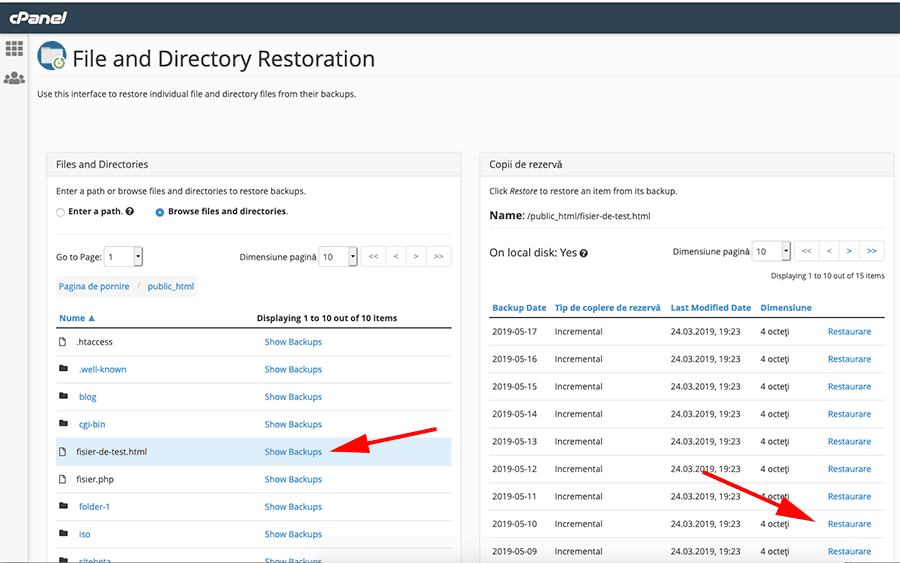
A file selected with dated backups and Restore actions.
The image connects the file to available backup dates. Host-Age illustrated guide ↗
04

Open phpMyAdmin

In the cPanel Databases group, open phpMyAdmin to restore an SQL database backup.
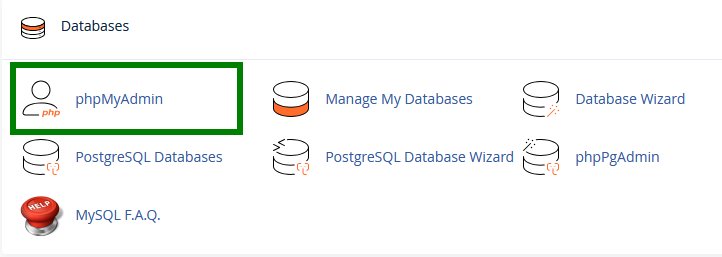
phpMyAdmin highlighted in the cPanel Databases group.
Start here to import the database backup. Namecheap illustrated guide ↗
05

Select the target database

Choose the correct database in the left sidebar. Create an empty database and privileged user first if required.
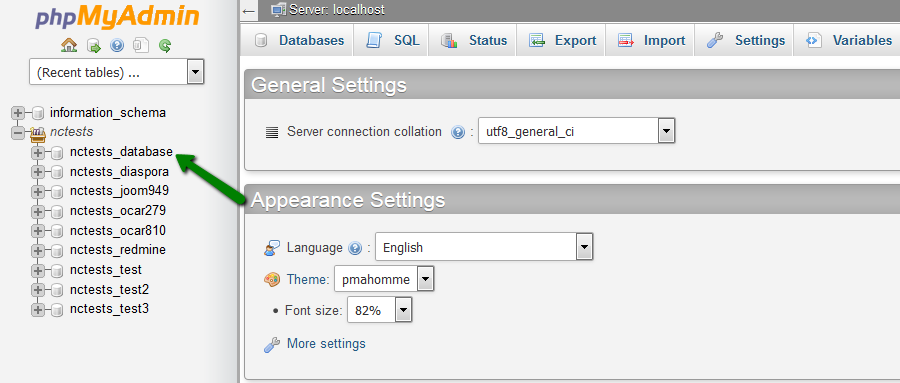
Selecting the target database in phpMyAdmin.
The arrow identifies the database receiving the import. Namecheap illustrated guide ↗
06

Open Import

With the database selected, choose Import from the top navigation.
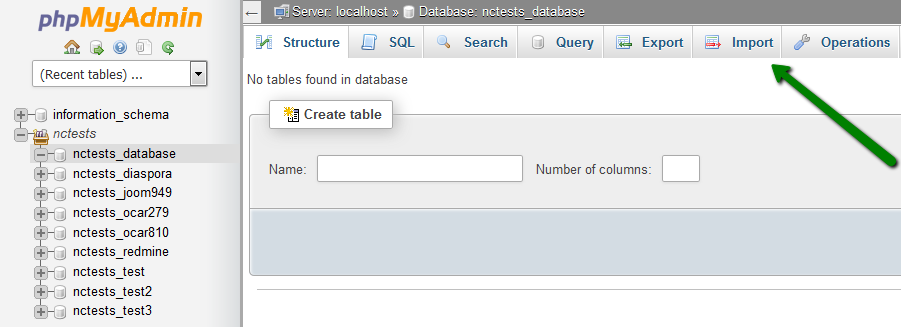
Import tab inside the selected phpMyAdmin database.
Confirm the database name before opening Import. Namecheap illustrated guide ↗
07

Choose the SQL file and run

Choose Browse, select the .sql or supported compressed SQL file, keep Format set to SQL, and choose Go.
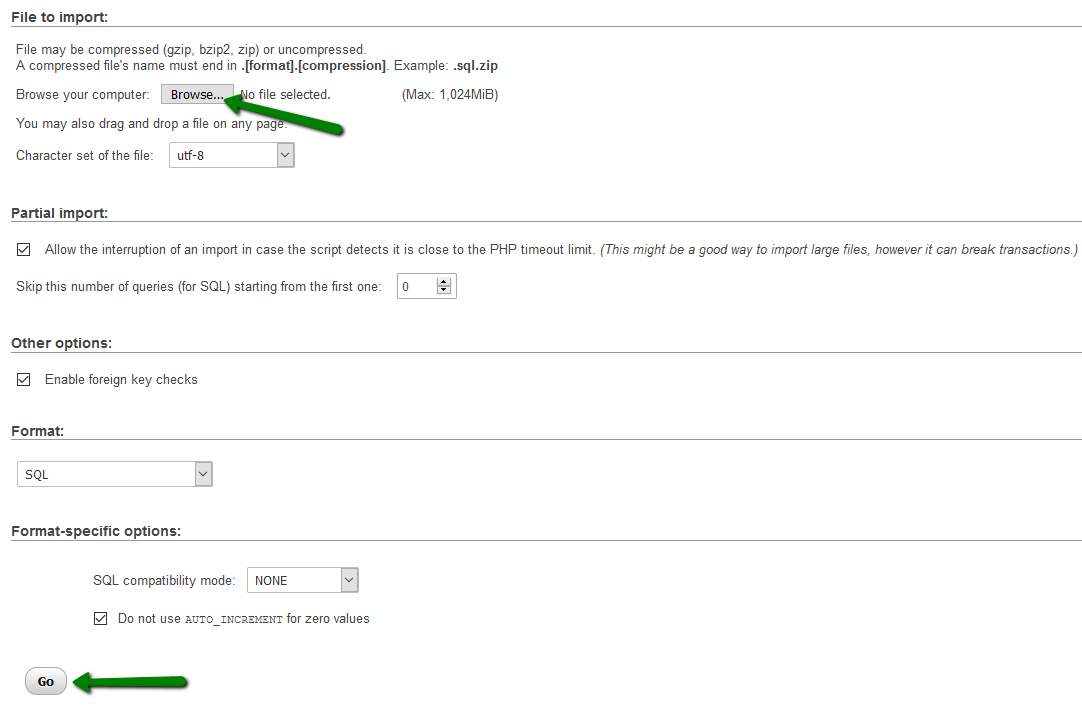
SQL file chooser, SQL format, and Go button.
The image shows the file control and execution button. Namecheap illustrated guide ↗
08

Confirm successful import

Wait for “Import has been successfully finished” and confirm the tables appear in the sidebar.
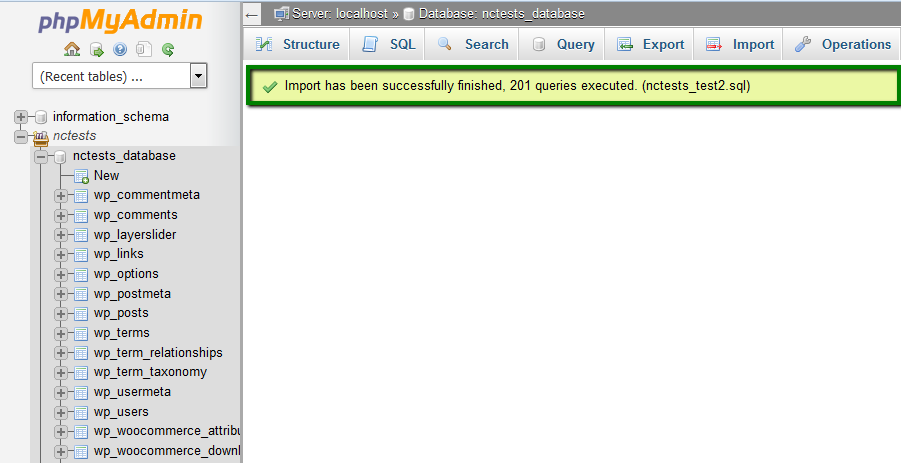
Successful phpMyAdmin import message and restored tables.
This is the visible success state for the import. Namecheap illustrated guide ↗
Important
A restore can overwrite current data. Confirm the date and target and back up the live database before importing SQL.

The restore is complete

Clear the application cache, test the site and forms, and review logs before declaring the service stable.

Primary technical source: Official cPanel documentation

ADVANCED TECHNOLOGY SOLUTIONS

Technology built around your business.

ROT4 designs, delivers, and supports secure technology environments that help organizations operate with confidence and scale without friction.

IT InfrastructureCybersecurityCloud & HostingDigital Solutions

Let's build what comes next.

+20 127 060 7155

Speak with our team

info@rot4.com.eg

Send us an email

Cairo, Egypt

Our base of operations